Choosing a spotting scope: the spec sheet vs the view

The question isn’t whether you can see a dunlin at range — it’s whether you can see the scapular fringes well enough to age it, in flat estuary light, at eight in the morning, without your eyes aching after twenty minutes. That gap between “visible” and “readable” is where the spec sheet stops helping and the optics start mattering.
Objective diameter: the light budget
The objective lens sets how much light the scope can gather. Bigger glass means a brighter image, especially in poor light, but it also means more weight on the tripod and more bulk in the bag. The practical range for birding scopes falls into two camps: 60–65 mm and 77–85 mm.
An 80 mm or 85 mm objective pulls ahead when you’re watching waders on a grey estuary at dawn or dusk, or when you’re pushing magnification above 40×. The smaller objective runs out of light noticeably faster as you increase power. If most of your scoping happens on an open estuary or reservoir where you’re often working at range, the larger objective earns its keep. If you walk to your patch and weight matters more than the last fifteen minutes of dusk, the smaller scope is a legitimate choice rather than a compromise.
Magnification range and exit pupil
Most birding scopes ship with a zoom eyepiece covering roughly 20–60× or 25–50×. The zoom range matters less than the usable range — the magnifications where the image stays sharp and bright enough to be worth using.
Exit pupil governs perceived brightness. An 80 mm scope at 20× gives you a 4 mm exit pupil, which is generous. At 60× the same scope drops to about 1.3 mm, and the image dims and narrows. In practice, 40–50× is the ceiling for comfortable extended viewing on all but the brightest days. People tend to treat the top end of the zoom as something that exists but gets used less than you’d expect.
Pay more attention to the minimum magnification than the maximum. A scope that starts at 20× with a wide apparent field of view is far more pleasant for scanning a mudflat than one that starts at 25×. You cover more ground per sweep.
Angled vs straight: geometry, not religion
This one gets treated as pure preference, but there’s a mechanical difference worth understanding. An angled scope (typically 45°) lets you use a shorter tripod for the same viewing height, because you’re looking down into the eyepiece rather than straight along the barrel. A shorter tripod is a more stable tripod, and stability is magnification’s silent partner.
Angled scopes make it easier to share views — everyone adjusts their stance rather than cranking the tripod up and down. On a seawatch where you’re sitting in a shelter, angled bodies are almost universal for good reason.
A straight scope has one clear advantage: acquiring a distant bird by sighting along the barrel, the way you’d point a finger. On a flat estuary scanning for a reported long-billed dowitcher among several hundred black-tailed godwits, that speed of acquisition matters.
For most estuary and reservoir birders, angled is the sound choice. But if you’re frequently scoping from a car window or a low bank where an angled body forces an awkward neck angle, try both before committing.
ED and fluorite glass: colour fringing in context
Chromatic aberration — colour fringing, usually a purple or green halo along high-contrast edges — is visible in many scoping situations, particularly when you’re working against the light.
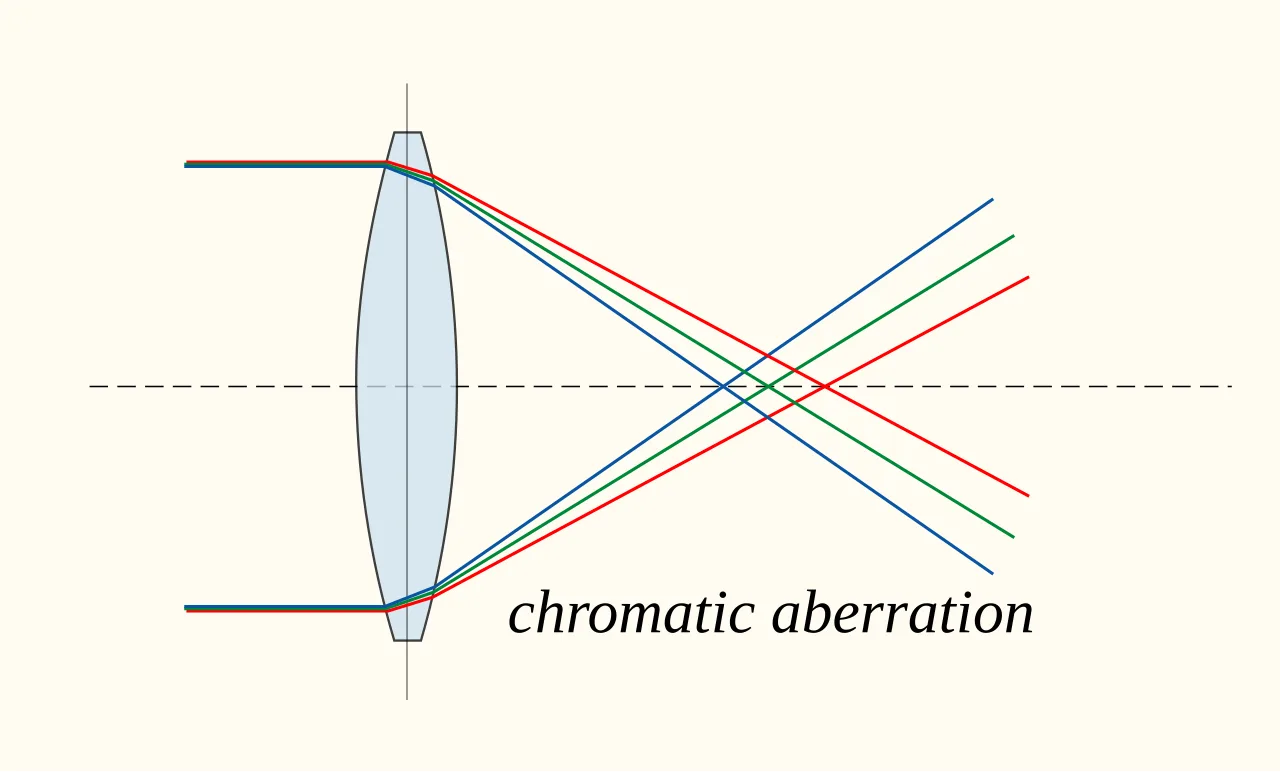
ED (extra-low dispersion) glass reduces this by bringing more wavelengths of light to a common focus. In practical terms, a well-designed ED scope shows noticeably less fringing than a standard-glass scope at the same magnification.
The difference is most visible at higher magnifications and in backlit conditions — exactly the situations estuary birding throws at you constantly. If your budget allows fluorite-grade glass, it pays off in exactly those conditions. If it doesn’t, a good ED scope is still a large step up from entry-level optics.
The eyepiece problem
Here’s the variable most spec sheets barely mention. A scope body is a light-gathering tube; the eyepiece is where that light gets turned into an image your eye can use. A mediocre zoom eyepiece on a superb body will waste most of what the body provides — soft edges and a narrow apparent field.
The apparent field of view is the eyepiece’s contribution. A wide-angle eyepiece at 30× might give you an apparent field of 66° or more, which feels immersive and makes scanning natural. A standard eyepiece at the same magnification might offer 55°, which feels like looking through a tunnel. The apparent field is what determines whether the view feels open or cramped.
Eye relief matters here too, especially for glasses wearers. Long eye relief (16 mm or more) is comfortable with spectacles; short eye relief forces you to press your eye uncomfortably close. Some eyepieces maintain their edge sharpness across the full field; others go soft in the outer third. This is difficult to judge from published specifications and easy to notice after ten minutes on a hide.
Where budget forces a choice, prioritise the eyepiece. A mid-range body with a top-tier eyepiece will usually outperform a flagship body with the kit zoom. Several manufacturers sell eyepieces separately, and the difference between their standard and wide-angle zooms is worth investigating.
Weight, balance and close focus
Weight numbers matter less on a tripod than in a rucksack, and they matter most on the walk to the estuary when you’re also carrying binoculars, a flask, and the quiet certainty that the reported Hudsonian whimbrel has already left.
Balance is harder to spec but easy to feel. A scope that’s heavy in the objective end nods forward on the tripod; one that’s balanced near the mounting foot stays put when you let go.
If you ever scope from a hide where birds feed close in, a scope that won’t focus inside 6 m is genuinely frustrating. It’s a small spec, but it’s the kind of thing you only discover matters after you’ve committed.
What the numbers can and can’t tell you
The numbers narrow the field. The view through the eyepiece, even briefly, is what closes the decision.
If you can get to a birdfair or a dealer who’ll let you compare two scopes side by side on a bright day and then again into the light, you’ll learn more in fifteen minutes than in a month of reading spec tables. Bring your own tripod. The scope has to work with the kit you already own, not the one in the showroom.
Sources
Specifications and references drawn on for this article.
- Chromatic aberrationen.wikipedia.org